Change the default branch on your git repo
September 30, 2020
GitHub is changing the default branch name on all new repositories from master to main. They obviously won’t change it on existing repos (because, you know, that would be super uncool and break half the internet). So maybe you want to update some (or all) of your existing repositories to use main as well. Or maybe you want to go with something else, like default or unicorns. It’s your repo, I won’t judge.
Surprisingly (maybe?) it’s not too hard! It will likely take you less than 5 minutes. Let’s dig in.
Update: GitHub recently introduced a new feature that makes it significantly easier to rename an existing branch in their UI. The steps below will still help you if you’re using GitLab or Bitbucket, but if you use GitHub you can use the built-in feature.
Step 1: Rename the branch
We’ll stick with main for this post, but feel free to substitute that for whatever you want. In your terminal at the root of your project, run this command:
git branch -m master mainThis will rename the master branch to main without modifying any of the branch’s history. Pretty nifty! If you run git branch -a in the terminal, you should no longer see master (but you should see remotes/origin/master - we’ll deal with that in a bit).
Cool, so now the branch is renamed on our machine. What’s next?
Step 2: Update the remote
We have to let the remote (aka GitHub) know that we have a new branch. That’s pretty standard - you likely do this anytime you’re about to create a pull request:
git push -u origin mainThat’s the command to tell the git remote that we have a new branch (-u flag sets “upstream tracking”). Nothing too crazy there.
Step 3: Change the default branch in your repo
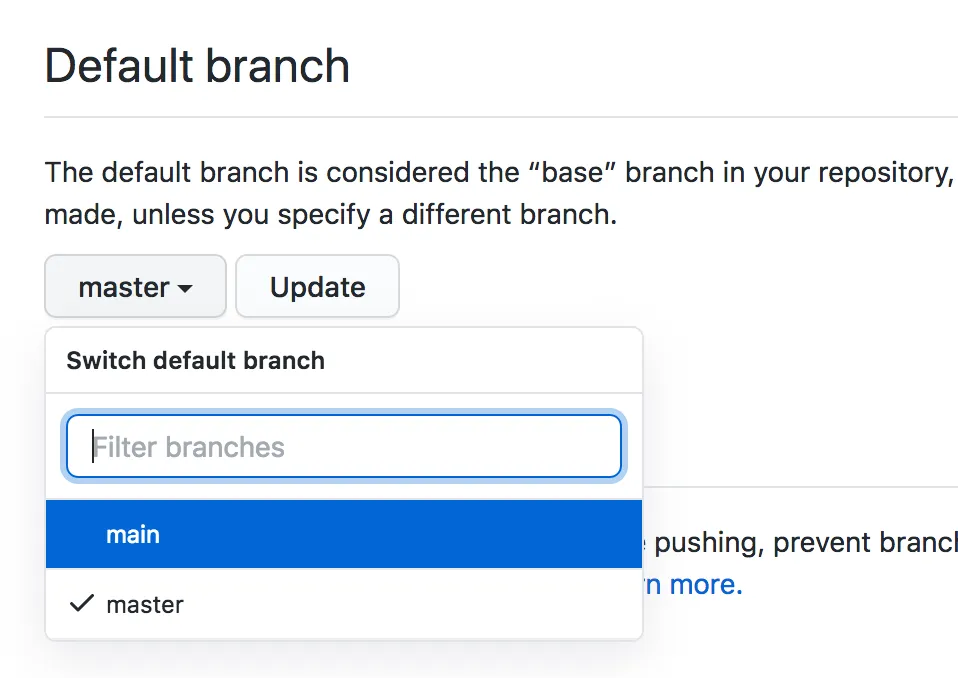
In your repo on GitHub.com, go to Settings > Branches, or navigate to https://github.com/your-user-name/your-repo/settings/branches and you should see an option at the top for “Default branch”. Click the dropdown and change it from master to main:

Don’t forget to click “Update” once you’ve selected a new branch!
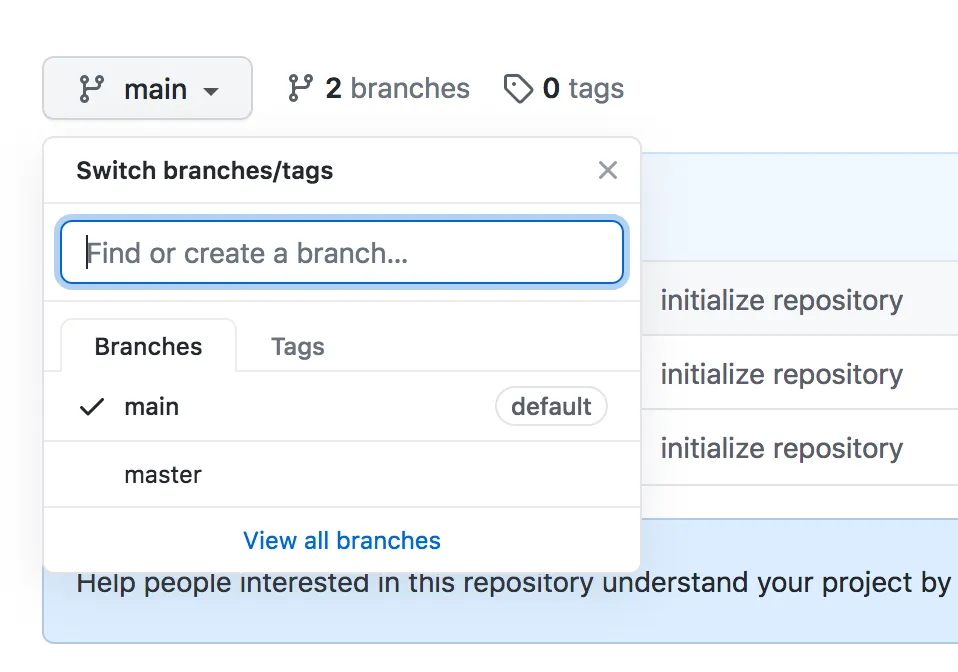
Now main is your default branch in the repo. Pull requests will automatically go against this branch, etc. - but we still have a little work to do. If you go to the main page for your repo, you’ll notice the master branch is still hanging around:

Furthermore, we still have the remote branch on our local repository at remotes/origin/master. Let’s clean that up too.
Step 4: Remove the master remote
Back in your terminal, run this command:
git branch -aYou should now see remotes for main and master:
$ git branch -a

* main
  remotes/origin/main
  remotes/origin/master
You might also see this:
remotes/origin/HEAD -> origin/masterWe’ve got to clean that up too, and we’re actually going to do this one first to avoid some issues down the road. If you see that line when you run git branch -a, you’ll want to run this command now:
git remote set-head origin mainFirst, let’s clean up that remote that we no longer need:
git push origin --delete masterThat’s the command to delete a remote branch. You can also do this from GitHub.com by clicking the ”# branches” link right next to the branch selector or going to https://github.com/your-user-name/your-repo/branches and clicking the little trash can icon on the master branch. Whatever suits your fancy - they do the same thing.
Little side note: if you choose to delete master from the UI instead of the terminal, you’ll need to do a git fetch or git pull on your machine for that remote to go away. If you run the terminal command, it will delete it both locally and remotely. After running git pull, if you see a message like this, it means you needed to run that first command:
From https://github.com/mikemcbride/learn-rust
- [deleted]         (none)     -> origin/master
   (refs/remotes/origin/HEAD has become dangling)
Don’t fret - we can still fix it. Just run the command now and everything will be okay:
git remote set-head origin mainAll better! Let’s wrap it up now.
Step 5: Double check your work
At this point, everything should be working smoothly. Let’s double check that we see what we’re expecting, just to be sure… run this in your terminal:
git branch -aAssuming you did not have any other branches when we started this little journey, here’s what you should see:
$ git branch -a
* main
  remotes/origin/HEAD -> origin/main
  remotes/origin/main
You might not see that remotes/origin/HEAD line - and that’s okay. If you didn’t run the set-head command and you did have a HEAD there, you’ll see something like this:
$ git branch -a
warning: ignoring broken ref refs/remotes/origin/HEAD
* main
  remotes/origin/main
We can fix up that broken ref by running the same command from earlier:
git remote set-head origin mainConclusion
That’s it! Your default branch in your repo has been switched from master to main, and it should be smooth sailing from here. I hope you found this helpful!